Using the Website
When you log in to RIPE Atlas with your RIPE NCC Access account, the first page you see is your personal dashboard. This page explains how to find your way around the website, what the dashboard shows and how to arrange it, and where to find your messages and preferences.
If you are not logged in, the home page shows an introduction to RIPE Atlas with live network figures instead, and a link to log in or create a free account.
Finding your way around
The sidebar on the left of every page gives you access to the main parts of the website:
- Dashboard: your personal dashboard, described below
- Probes: the list of public probes, and your own probes on the Mine tab
- Anchors: the list and map of all anchors (see Anchors)
- Measurements: public measurements, your own measurements, and the form to create new ones
- Internet Maps: maps built from RIPE Atlas data (see Internet Maps)
- Statistics: coverage and statistics for the whole network (see Statistics)
- Use Cases: tools for specific tasks, such as Reachability Testing, Domain Monitoring and Region Meshes. The individual use cases are listed under it (see Tools + Code)
- About RIPE Atlas: the RIPE Atlas pages on the RIPE NCC website
At the bottom of the sidebar you will find links to this Documentation, your Preferences, a Feedback page with ways to contact us, and Legal information (copyright, privacy, terms and cookies).
The dashboard
The dashboard is made up of cards. Which cards you see depends on your roles in RIPE Atlas, for example whether you host a probe or an anchor, or work for a RIPE NCC member.
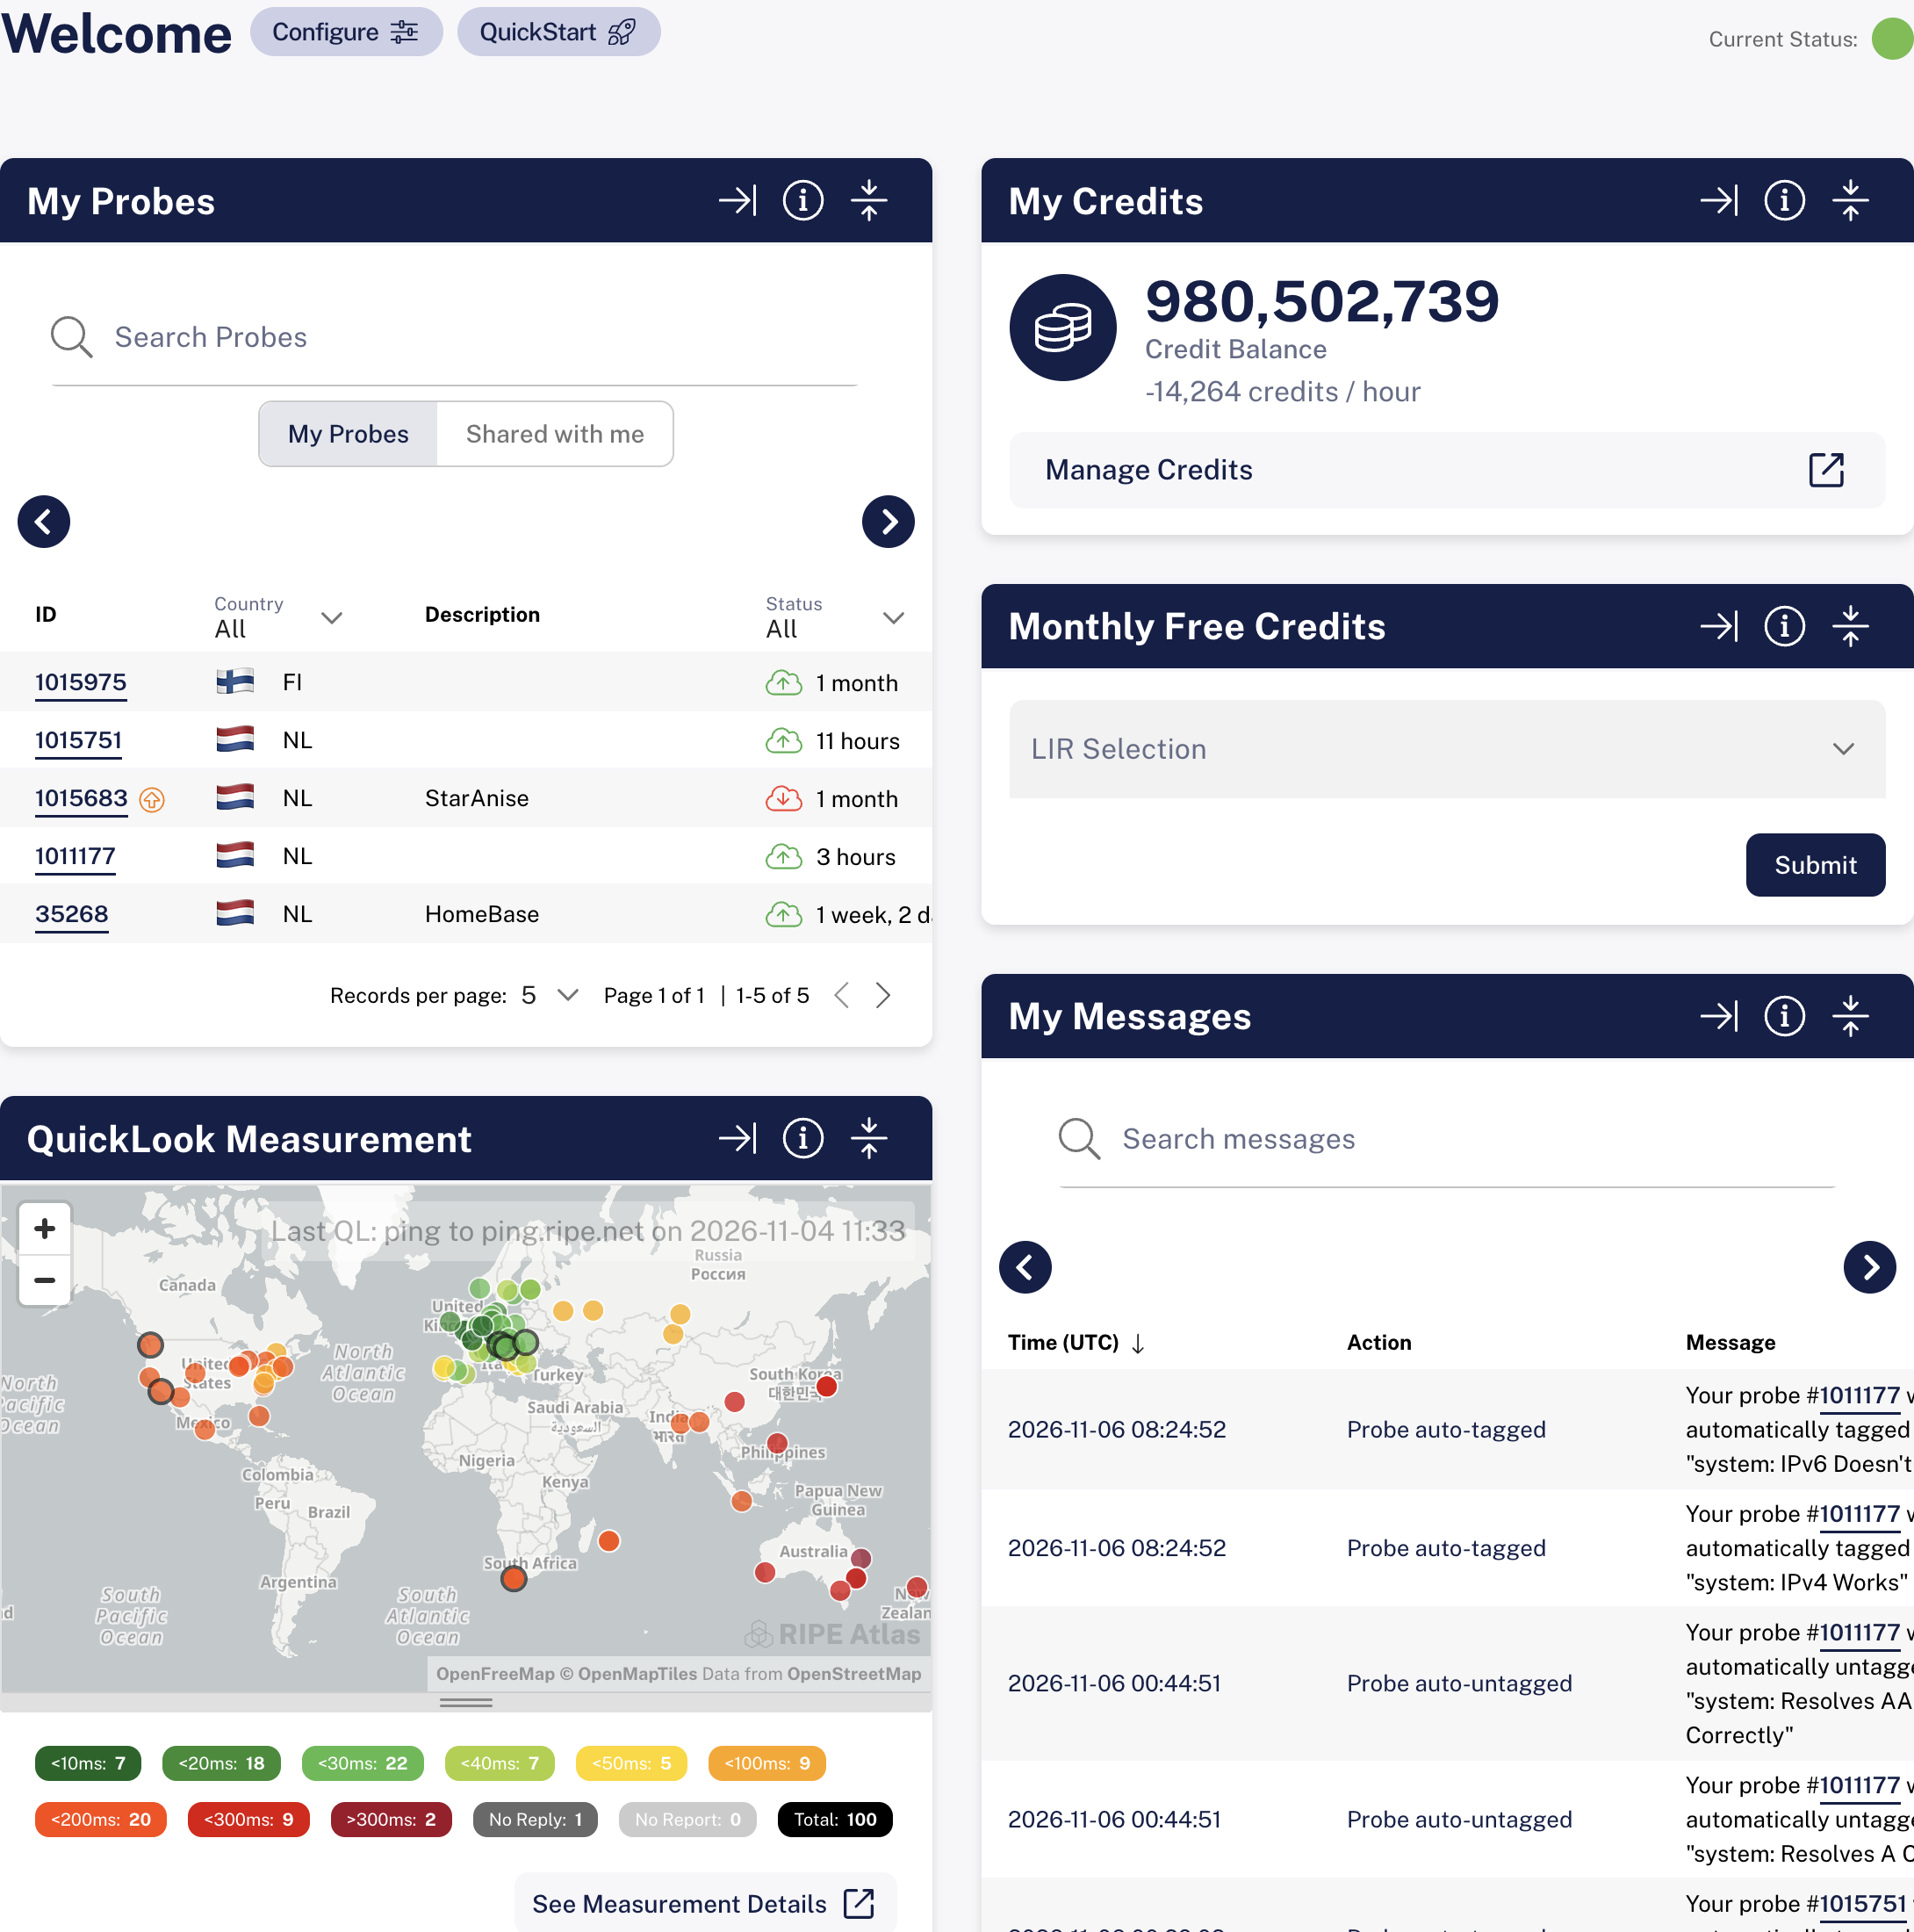
Cards for every user
| Card | What it is for |
|---|---|
| RIPE Atlas News | Announcements from the RIPE Atlas team. |
| QuickLook Measurement | Run a quick ping or traceroute to a target of your choice and watch the results come in on a map. See Quick Measurements. |
| My Credits | Your credit balance and current spending, with a Manage Credits button that opens your Credits page. Eligible new accounts see a button to claim free starter credits instead. See Credits. |
| My Measurements | Your measurements, with their ID, target, description and interval. Use the search field to find a measurement, and the plus symbol in the title bar to create a new one. |
| My Messages | Notifications from RIPE Atlas about events that affect you. See Messages. |
| My API Keys | Your API keys. Use the plus symbol in the title bar to create a new key. See Creating and managing API keys. |
| My Quotas | Your current usage against your limits, for example your daily credit spending and the number of measurements running in parallel. See Quotas. |
| Community Events | Upcoming events in the Internet community. |
Cards for particular roles
| Card | Who sees it | What it is for |
|---|---|---|
| My Probes | Probe hosts, and anyone who has had a probe shared with them | Your probes, with their ID, country, description and connection status. Click a probe's ID to open its page. |
| My Anchors | Anchor hosts | Your anchors, what to do next for each, and change requests. See Anchor Management. |
| Ambassador Probe Management | RIPE Atlas ambassadors | The probes you have handed out and their status. See Ambassador Probe Management. Ambassadors can also mark themselves as attending events in the Community Events card (I'll be there). |
| Monthly Free Credits | RIPE NCC members | Claim your LIR's monthly free credits. See Monthly free credits for members. |
| Member Overview | RIPE NCC members | The probes, anchors and measurements in your LIR's address space. See Member Overview. |
Arranging your cards
Every card has a row of buttons in its title bar:
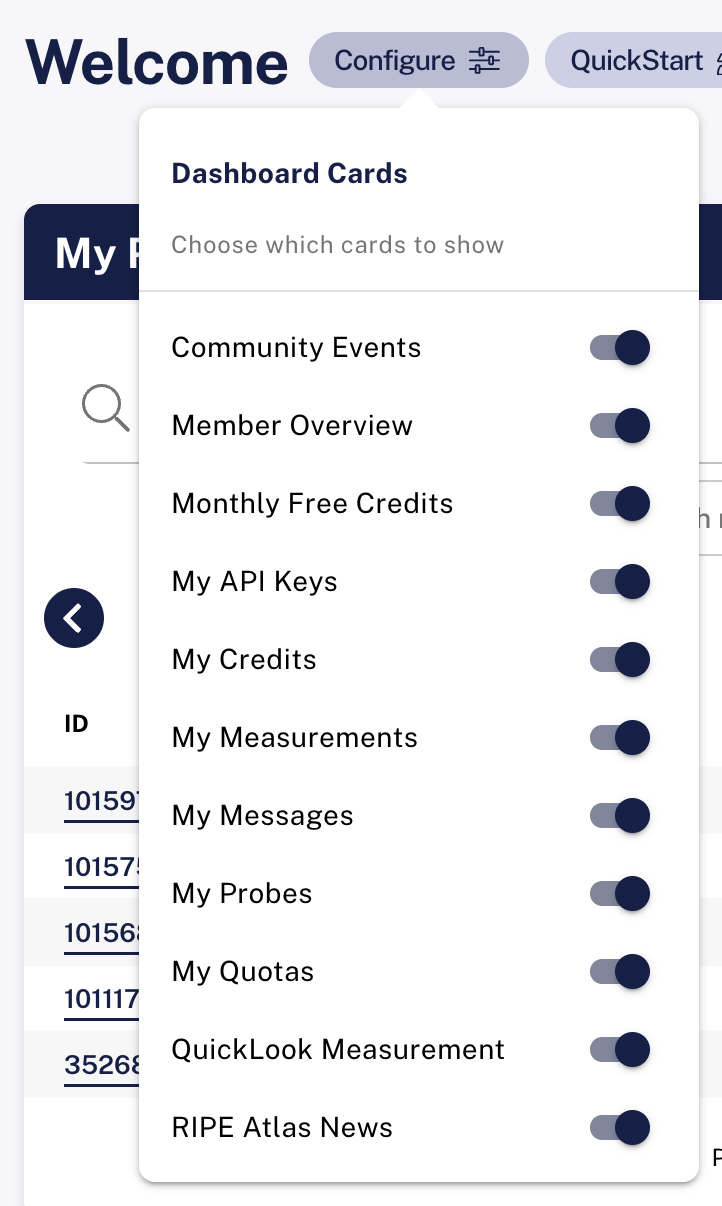
- Show Info / Hide Info (the ⓘ button) shows or hides a short explanation of the card.
- Collapse / Expand folds the card down to its title bar, or opens it again.
- Make wide / Make narrow switches the card between half and full width. This button is only offered on large screens.
On a desktop browser you can also drag a card by its title bar to move it to a different place on the dashboard.
To choose which cards appear at all, click Configure next to the welcome message at the top of the dashboard. The Dashboard Cards menu lists every card available to you, with a toggle to show or hide each one. When cards are hidden, the number hidden is shown next to the Configure button.
Your card layout, sizes and visibility are saved to your account, so the dashboard looks the same the next time you log in, on any computer.
System status
The top right of the dashboard shows Current Status: followed by a coloured dot. The colour shows how quickly measurement results are currently being processed:
- Green: results are arriving normally (a median delay of up to five minutes)
- Orange: results are delayed (up to 20 minutes)
- Red: results are seriously delayed (more than 20 minutes)
Hover over the dot to see the Atlas System Status summary: the median delay, the number of connected probes, the number of running measurements, and a Statistics button that opens the Status tab of the Statistics page.
The QuickStart guide
The QuickStart button next to the welcome message opens a full-window guide to what you can do with your RIPE Atlas account. The first time you visit the dashboard, a small New to RIPE Atlas? tip points to it; choose Take a look to open the guide, or Not now to dismiss the tip.
The guide is arranged as a set of subjects. Pick a subject to read about it, use All subjects to go back to the overview, and close the guide with the × button to return to the dashboard. The subjects are tailored to your roles. Everyone sees subjects such as Welcome Aboard, Credits, Measurements and Learn More, while probe hosts, anchor hosts, members, sponsors and ambassadors get extra subjects about their role.
If your account is eligible for the free starter credits, the guide also lets you claim them.
Messages
RIPE Atlas sends you messages about events that affect you, for example changes in the status of your probes. You can read them in the My Messages card on your dashboard, or on the separate Messages page, which shows the same list on a page of its own. The newest messages are shown first.
Each message shows its Time (in UTC or your local time, depending on your preferences), the Action it relates to, and the Message itself. Use the Search messages field to find a particular message.
To choose which notifications RIPE Atlas sends you by email, use the Notifications section of your preferences.
Preferences
Open your preferences with Preferences at the bottom of the sidebar, or go to atlas.ripe.net/prefs. Changes are saved as soon as you make them.
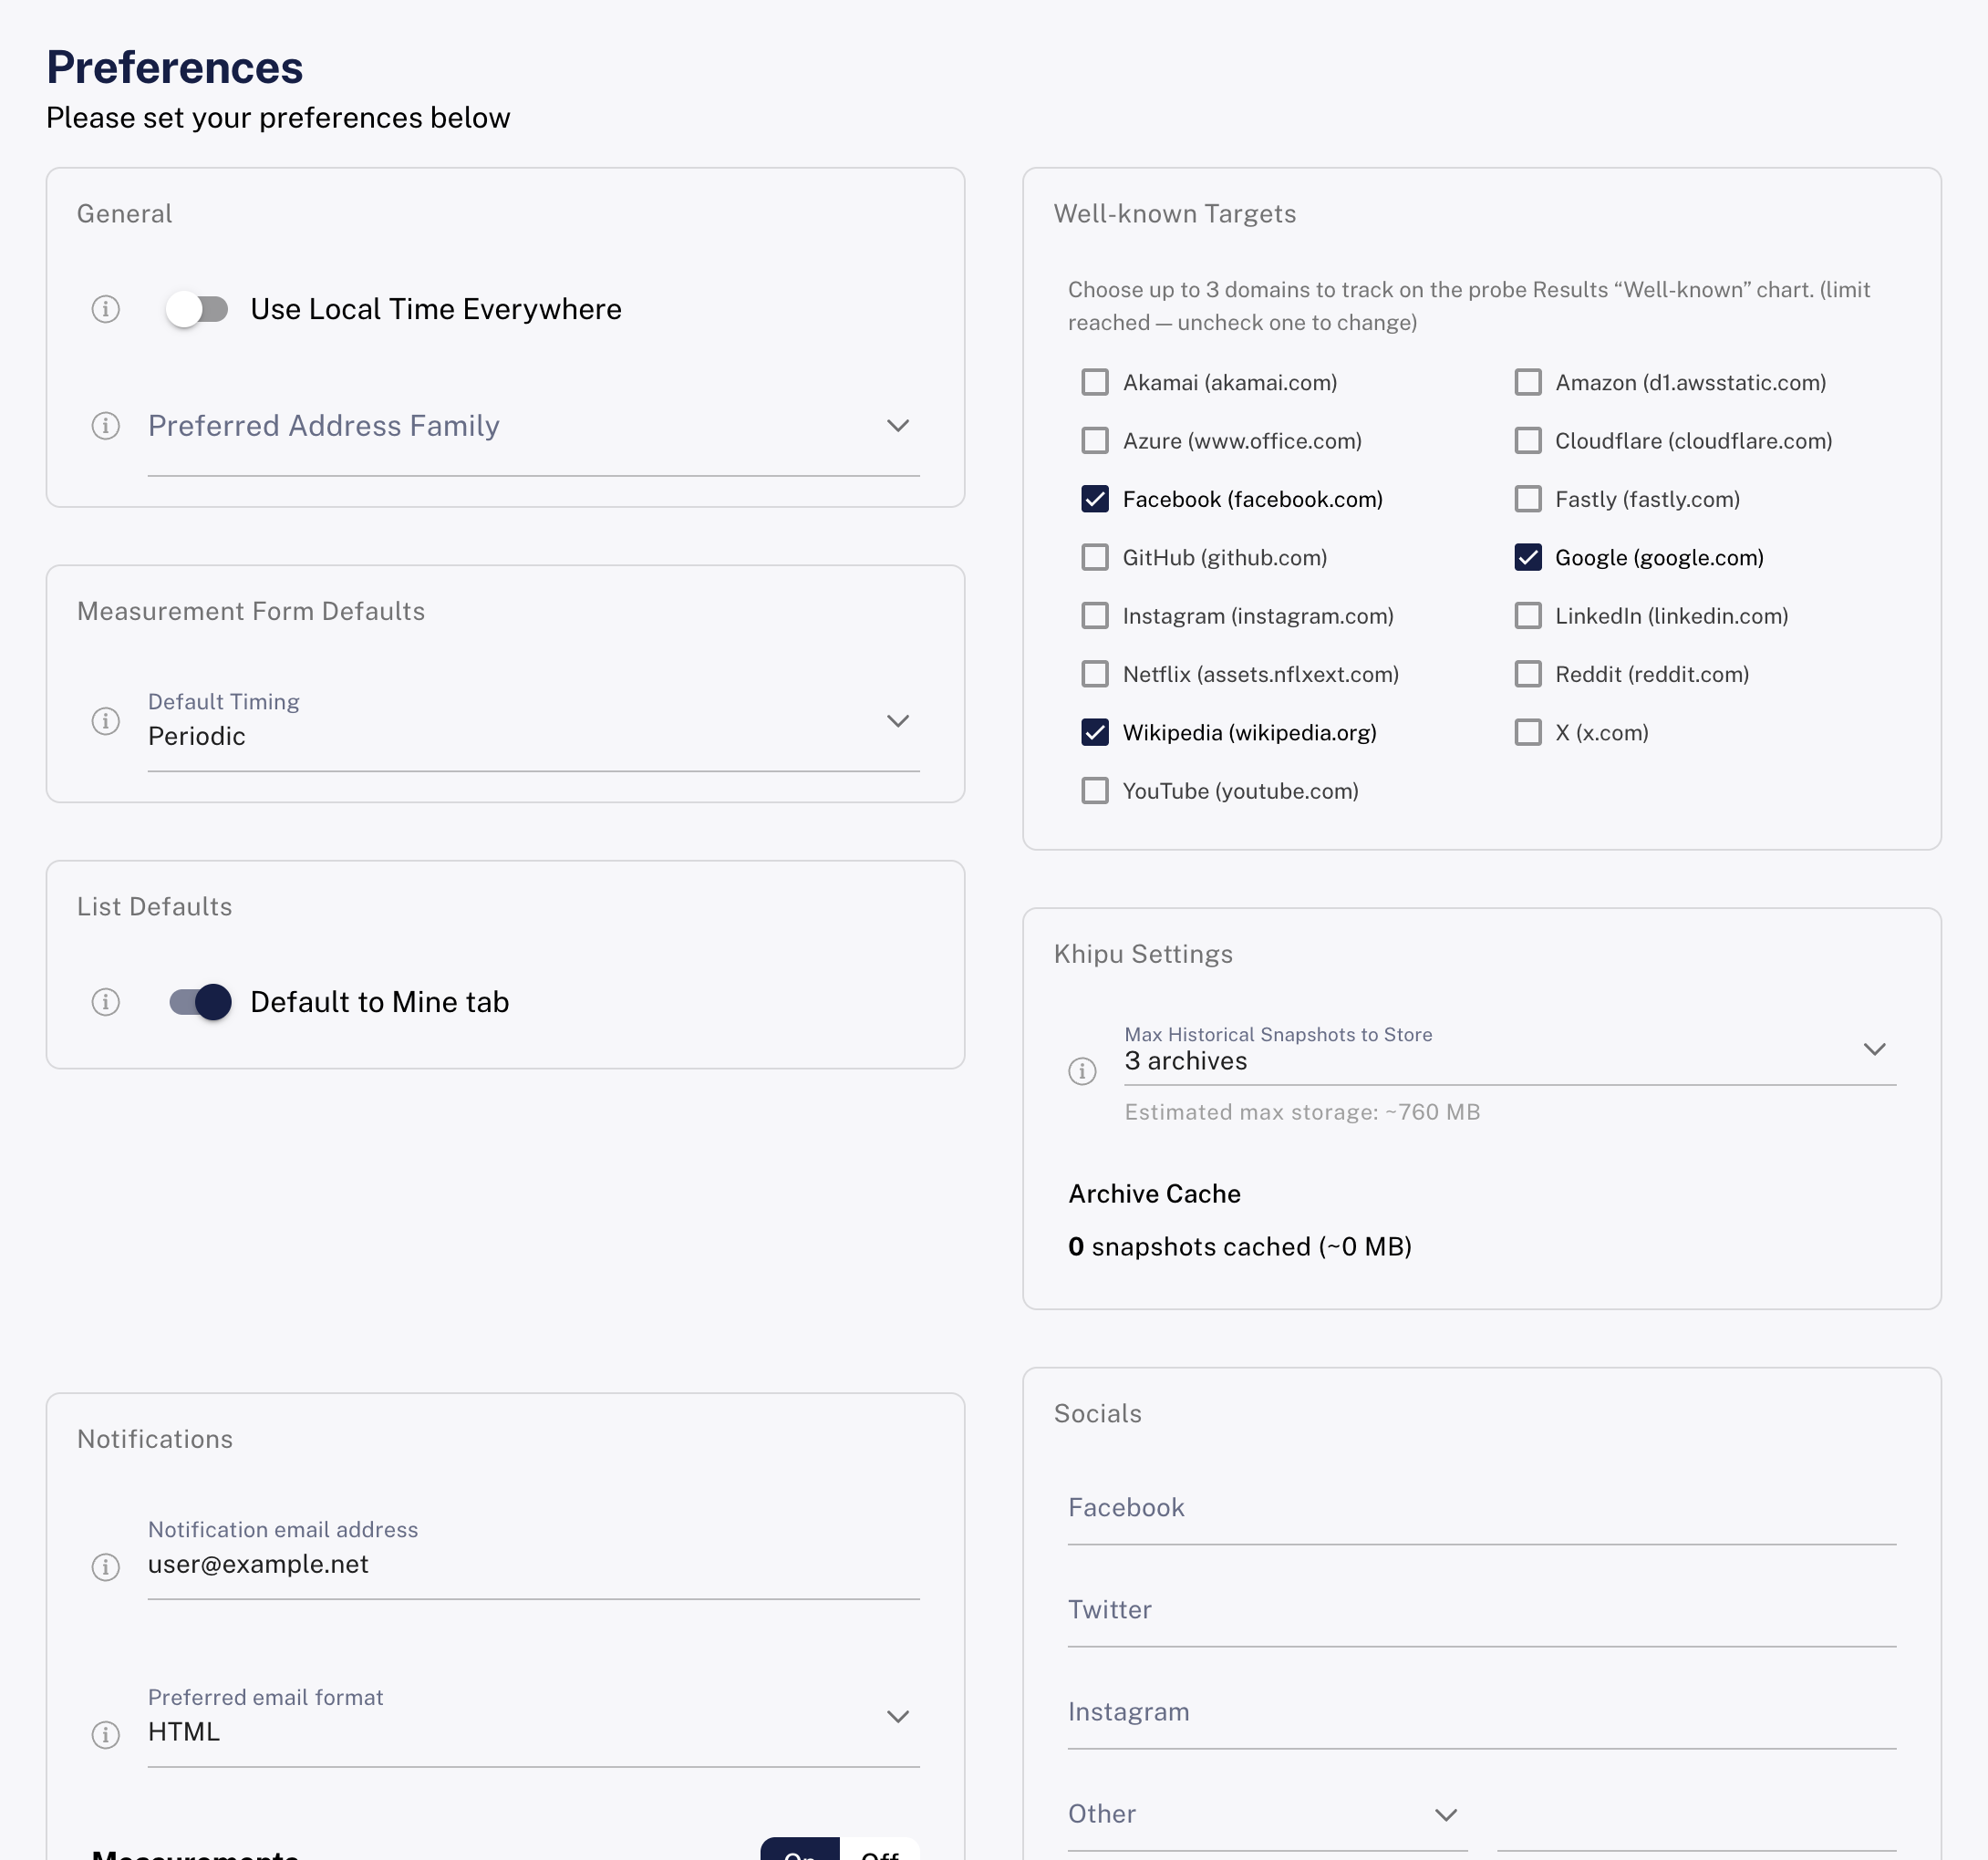
General
- Use Local Time Everywhere: show times in your browser's local time zone instead of UTC.
- Preferred Address Family: whether forms and charts across the website default to IPv4 or IPv6. This does not affect how your own probe connects to RIPE Atlas.
Well-known Targets
Choose which well-known targets are shown by default in the well-known results chart on probe pages.
Measurement Form Defaults
Default Timing sets whether the measurement creation form starts with One-off or Periodic timing selected.
List Defaults
Turn on Default to Mine tab to open the Mine tab instead of the public list when you go to Probes or Measurements in the sidebar.
Khipu Settings
Khipu keeps historical snapshots of routing and location data in your browser, so that it can analyse older measurements accurately.
- Max Historical Snapshots to Store: how many historical snapshots to keep (from 0 (only current) up to 20 archives), with an estimate of the storage this needs. The current snapshot is always kept as well.
- Archive Cache: how many snapshots are stored at the moment, and how much space they take. Click Delete Archive Cache to remove them from your browser.
Socials
Links to your social media profiles: Facebook, Twitter, Instagram, and one more of your choice under Other (YouTube, LinkedIn, Pinterest, Mastodon, GitHub or a URL). If you are an ambassador, these are shown next to your name in the attendee lists of the community events you have said you will attend.
Ambassador Miscellaneous
Ambassadors can set their T-shirt size here.
Notifications
- Notification email address: the address RIPE Atlas sends notifications to. If you leave it empty, the email address of your RIPE NCC Access account is used.
- Preferred email format: receive notification emails as Plain text or HTML.
Below these, notifications are arranged in groups, such as General, Measurements and Probes. You only see the groups that apply to your roles, for example Anchors if you host an anchor. Each group has an On / Off switch:
- Off turns off all notifications in that group.
- On shows the individual notifications in the group, each with its own toggle, so you can choose exactly which ones you want. Hover over the ⓘ icon next to a notification for a description of it.